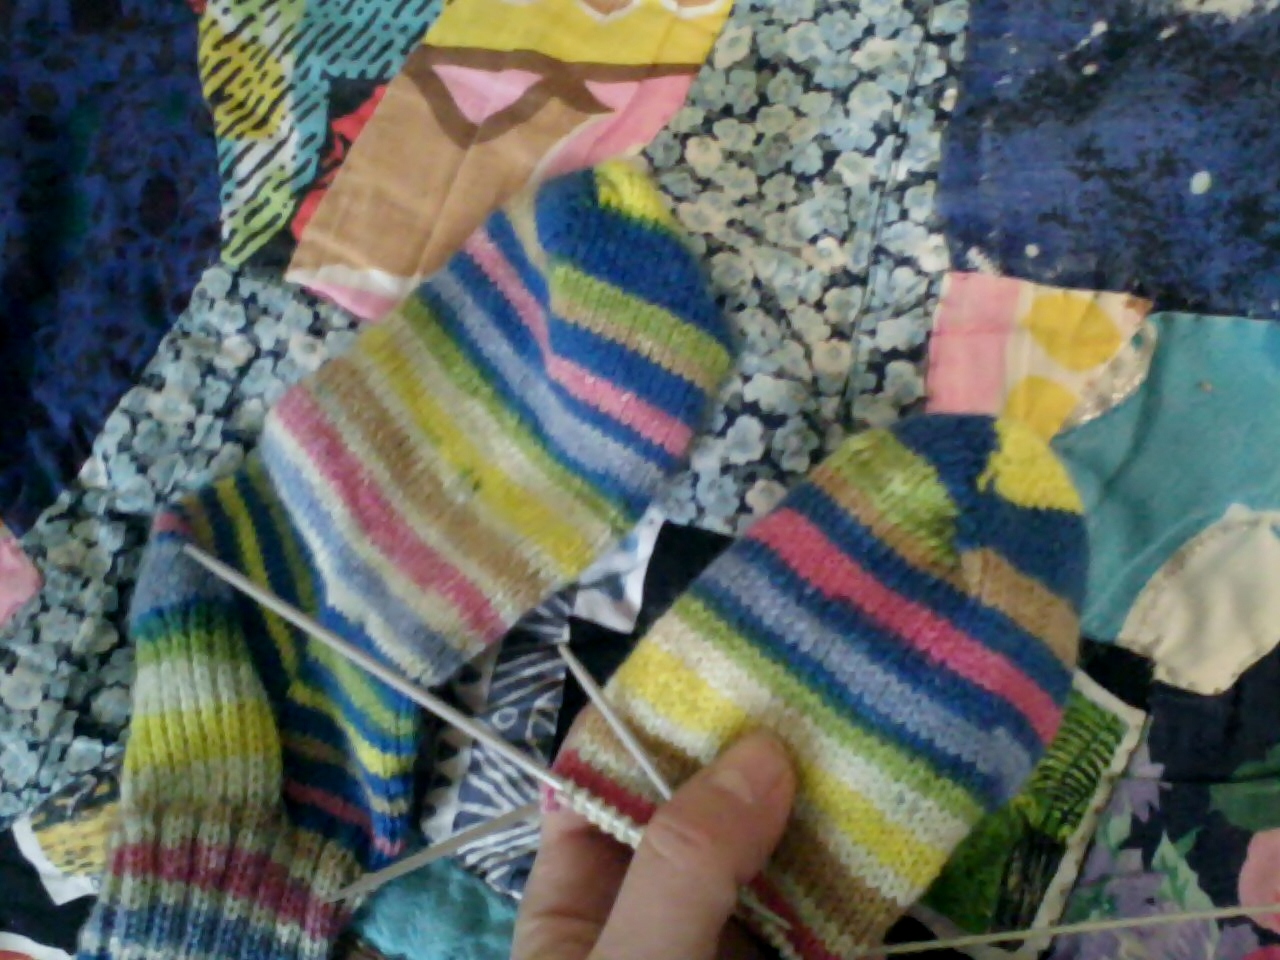
Thursday, September 05, 2013

Savage ends!

I'm making progress on the "Cross Country" sweater for V., although I'm starting to think I need more needles. That's always the refrain, isn't it? I need more. More yarn, more magazines, more books, more needles. But I do. The collar is supposed to be done using a circular US #2, something which I (lap knitter) would be very surprised to possess. I do have some circulars, but they are #0's, I think, because the thought of trying lace on multiple dpns made me want to cry.

I think I'll block it somewhat while it's in this flattened state
I have the arms on the body and the shoulders joined, as you see above. I tried it on the kid and it all seems fine. V. is a lean 4 yr. old, and any of you familiar with slip stitch patterns (such as this one) know that there is a LOT of give in the fabric.

What she is going to wear with it, I don't know. I've really only begun her winter wardrobe for this year. I have some stuff I've found at thrift stores and such that I'm rather proud of, but nothing that is basic like a pair of jeans:
This $2 thriftstore sweater is hand made in Ireland! With SHEEP!
The inside of "Cross Country" is giving me pause:

Not actually savaged, just not woven in. :(
I need to find my crochet hooks and address it at some point. That point is NOT today. I may, in fact, finish the Funky Sweater first. But this sweater will be cute in the end. I've laid it out so that you can imagine it better:
Imagine all those ends gone. I know I'm trying to.

Sunday, September 01, 2013

Funky Sweater

In a previous post I mentioned that I was making myself a sweater for a change. I've thought about this sweater for some time, especially how it's not something I would wear to anything like work. (Unless I was a circus clown, I suppose.)
I had to stop when I ran out of red
I have a habit of picking up crafting books (heck, any kind of book, the more weird and obscure the better) at thrift stores, and that is where I found this pattern. It is from "Knitting" by the Editors of the Ladies' Home Journal (1977). I couldn't even get a photo of this book by Googling the name or ISBN. So I took my own photograph:
Now the world knows what it is missing
And then I snapped a couple bad shots of the joys to be found inside. 1977 was an interesting year for knitwear, because they didn't seem to realize how horrible Orlon acrylics were yet, especially as swimwear.
I have worse patterns for bathing suits. Trust me.
There was also no moderation as far as patterns were concerned, or color choices. They could have learned a lot from Buddha about the Middle Way, but I think they may have been too far into cocaine and disco by then.
.
Is a Tom Petty video coming to mind here?
Ugly, plus duck. Everything is better with a duck.
I have no words for this one.
There is just a hint of lingering 1920's nostalgia, which is one of the saving graces of this period. (Thank you, The Great Gatsby!) 

Getting ready to go punting on the Thames
But I have not completely lost my mind. I am heavily modifying the charmingly subdued sweater you see below:
I have no excuse to offer.
Instead of using ten colors, I'm using seven, because that was what I happened to have. This required a bit of thinking on my part, which may or may not work out. (At least I did a lot of the thinking before I cast on. Seems to always work out a little better that way.) The other modification is making it a hybrid of Paisley from Kim Hargreaves A Season's Tale; the body will be longer. There will be no cowl, just a deeper scoop neck.


Thursday, August 29, 2013

Zebra Chevron

I've begun a new project, even though I have whole box of projects I need to work on. It doesn't require me purchasing any yarn, and it has been fermenting in my imagination for a while.
Maybe I should have warned you to wear sunglasses for this...
The swatch you see above, searing your eyeballs, is of a mosaic stitch called Zebra Chevron. I saw this stitch while leafing through A Treasury of Knitting Patterns by Barbara G. Walker, and it occurred to me that it just might be possible to make a tam in this stitch whereby the decreases are hidden in the chevron pattern. So, now we will see if that is doable.

Of course, I have spent the better part of the day wishing I had done the math before casting on. Instead, I knit a band in the desired gauge and size and then tried to figure out how many stitches I should be working in the round to make the Zebra Chevron pattern work out. Much muttered swearing and ripping of yarn and scribbling of long division later, I think I have it. And I think I'm buying a calculator.

The actual hat will be in the same brand and size yarn as the swatch, but the Lego blue is being replaced by a heathered gray which will hopefully temper the violent pink.

Wednesday, August 28, 2013

More funky socks

Way back when I made my first pair of funky socks I'd done it reluctantly.Then the praise started rolling in when I wore them out in public. (A lot of directed from my co-workers, a bunch of middle class, very straight-laced architects. I was baffled.) And, they were practical, comfortable socks. Soon they became my favorite socks and I even ripped out the top of them to use up the rest of the yarn.
Now the snow can blow up my pants leg all it wants.
I went out of my way to make these funky socks.

Well, if you count randomly stumbling across a yarn sale while waiting for an appointment going out of your way. But the moment I saw the yarn, I was full of intention. Yes, yes, I know that's how it is with yarn romances. It seduces you in the store and you totally have plans for it, sort of. But I really did it this time.
The wide band of tan at the toe goes on the BOTTOM
I started at the toe with a provisional cast on of 30 on my usual US #2 needles so that I could use up all the yarn by making the leg as long as possible. This was also my first experience with the toe-up heel flap, and I loved it. I tried to make the second sock match the first as much as possible, but I got the top on the bottom and the bottom on the top... and I had to have a little talk with myself about whether I really needed to rip the whole thing out and turn it over or not. I decided to let it be, but I still think about it. I just try not to look when I'm putting it on. I can cope. I think.

The quilt is equally chaotic.
They fit nicely, and they are definitely funkalicious. So funkalicous that I was baffled for most of the first sock about what came next, color-wise. It seems that the alternation of the blue stripes happens every other repeat of the entire sequence of colors. I've never encountered this kind of thing before. Was it a manufacturing mistake? Intentional? I don't know. But lucky me, nobody liked the how strange the skeins of yarn looked, so I got these socks for less than $10.
Close-up of foot in sock.


Tuesday, August 27, 2013

Winter is coming!

No, really. I know it's +80 degrees outside right now, and my air conditioner sounds like it might have a stroke, but winter will be here before any of us knitters know it, and then where will we be?

That's right - so desperately behind in holiday knitting that we will be forced to give our loved ones our own knitted accessories. Then we will spend all winter tucking our hands into our jacket sleeves and walking around like a hunchback in the snow, a cheap dollar store beanie on our head.

Ok, perhaps I mean I will, not us. But not this year!

I'm making this for V:
I'm taking a pass on the pants and the stick
This is from Tessa Watts-Russell's Nursery Knits, which I scored at a thrift store. Some of the patterns are very dated ('80's) but most of them are classic and worth having. This particular sweater is called "Cross Country" (I suppose the little tyke is cross country skiing...? Looks more like an Alps adventure to me.)


It's a very basic sweater with slip-stitched stripes. I was expecting to purl on the reverse, since that makes the second row of color go smoother (no moving the yarn from front to back every other stitch) but that's not what the plan is, apparently. I suppressed my desire to modify and went with it. The result is the texture you see in these photos.
Completed back and front. Those ends will probably kill me.
The hem is being done on US #2 needles, so it's a tight affair. I went up a needle size or two for the body because I was concerned. But so far, so good. The yarn I'm using is KnitPicks Wool of the Andes in sport weight. I confess, yesterday I had to order more. But that is alright, because I also had to order more of the same kind of yarn for a sweater I've started for myself. I am NOT freezing my tuckus off this winter. Really.

Nice, tight bottom... edge. (I obviously need to get out more.:P)

Wednesday, March 13, 2013

Vintage sewing

I received a surprise package in the mail today from my paternal grandmother, who has been following my crafting antics, mostly on Facebook. (Yes, like millions, I am on Facebook. I find it is the fastest and most efficient way to disseminate information to family about V., so they can have practically daily updates about HER three year old antics, plus photos.) The bulk of the package was these two throw pillows, which had a note on top of them stating that they were made by my mother for my aunt Mary. This particular aunt was the baby of the family, so she was still in school when my parents married. 
My mom made these for my aunt in the 70's
Lots of trims!
The rest of the package was composed of trimmings (lace, bias tape, rick rack, etc.), appliques and do-dads. There is quite a variety and I'm sure I'll find a use for it all.

And some cute appliques
Can't you just picture a toddler dress with some bees on it?

And while we're looking at these appliques, check out that black patch with the embroidered flower on it. I've got a blurry close-up photo of it below for your edification. That white thing in the photo, on the left? That's my thumb. This is some seriously tiny embroidery.

Blurry close-up.
 I had to take a look at the back of the patch to confirm it was real embroidery, it's so minuscule. And indeed it is, because it has a fabric backing on it. I've seen this before on other needlework. I'm guessing it's to help keep the ends of the threads in place. (A similar effect can be seen a lot of modern, store-bought children's clothing that have appliques or embroidery - on the inside a piece of interfacing is adhered over the area that was decorated.)

Back of patch


I especially liked the patterned bias tape, and this teeny weeny basket. It could fit on my pinkie!

Tuesday, February 19, 2013

Saving a buck

I've been thinking a lot lately about extreme frugality, and this thinking has driven some of my projects. It's debatable whether it's really worthwhile to mend a piece of kid's clothing that could probably be obtained from the thrift store for $1, but that's what I've done. V. has worn a hole in the knee of a pair of brown leggings she wears frequently. I decided to patch it. This grand idea was partially inspired by the butterfly pants I recently fixed up for her, and partly by the heart-shaped pocket on shirt that I just put in the "recycle" pile because it's outgrown. That heart would make a perfect patch. However, being stark white, it would look dingy in no time at all, so I decided to embellish it since I am on an embroidering kick.
I lightly inked in a design to embroider
Main embroidery finished
Blanket stitched onto the leggings.
V. chose the color of the flowers from my box of embroidery thread. I made the bow holding the bouquet of flowers brown (and the blanket stitching) to tie-in the design to the color of the leggings.
I have yet to try them on V., but I think they will be cute on her, especially with a lavender or purple top.

Monday, February 11, 2013

Butterfly pants

I've been thinking a lot about V.'s wardrobe for next year. When you're a single mother with limited income, it's prudent to think somewhat long term about these things. I've acquired quite a few things from free boxes and thrift stores, including a pair of khaki Osh Kosh pants in size 4t that were in excellent shape, save a hole or two in the knees. They were 50 cents, so I couldn't pass them up. Especially since I had a solution: applique knee patches.

I have about a half yard of a printed cotton fabric with butterflies on it that struck me as being perfect for appliqueing. I could had done some simple, classic square knee patches, but if there was going to be something conspicuous on her pants, I figured it should have some flair.
Butterfly knees!
I probably set this one a little too high


I had the flu when I started working on these, so I was in the mood for a lot of sitting around, doing needlework. I did more than just blanket stitch them on - I added details, like tracing the ribbing on the wings with back stitching.I am optimistically hoping that the additional embroidery will make them more durable.
Plenty of room to grow into them
I can picture her wearing these during the fall, or late summer, playing in the garden. I think they'll be great play pants, since they are sturdy and whimsical.

Wednesday, January 30, 2013

My own garden

One foible of living in a city  - especially a big city (Philadelphia has about 1.5 million people!) with a population density of something like 14,000 people per square mile - is gardening space. Fortunately, Philadelphia has a lot of community gardens, so some people can scratch that particular itch to a certain extent. But I want my own garden. And I got one!

I know it doesn't look like much!
I've been given permission to have my way with this disused, rather shady backyard  about a block from where I am currently living. There IS a yard at my current residence, but who knows how long I will be here? And even though I will not be living at this garden, nor own it, I have had a degree of autonomy there so far that I could not get at home. Also, I could move from where I am to anywhere in the neighborhood and it would make no difference to this garden. One thing gardens need is more than just a season; this way, I can get that.

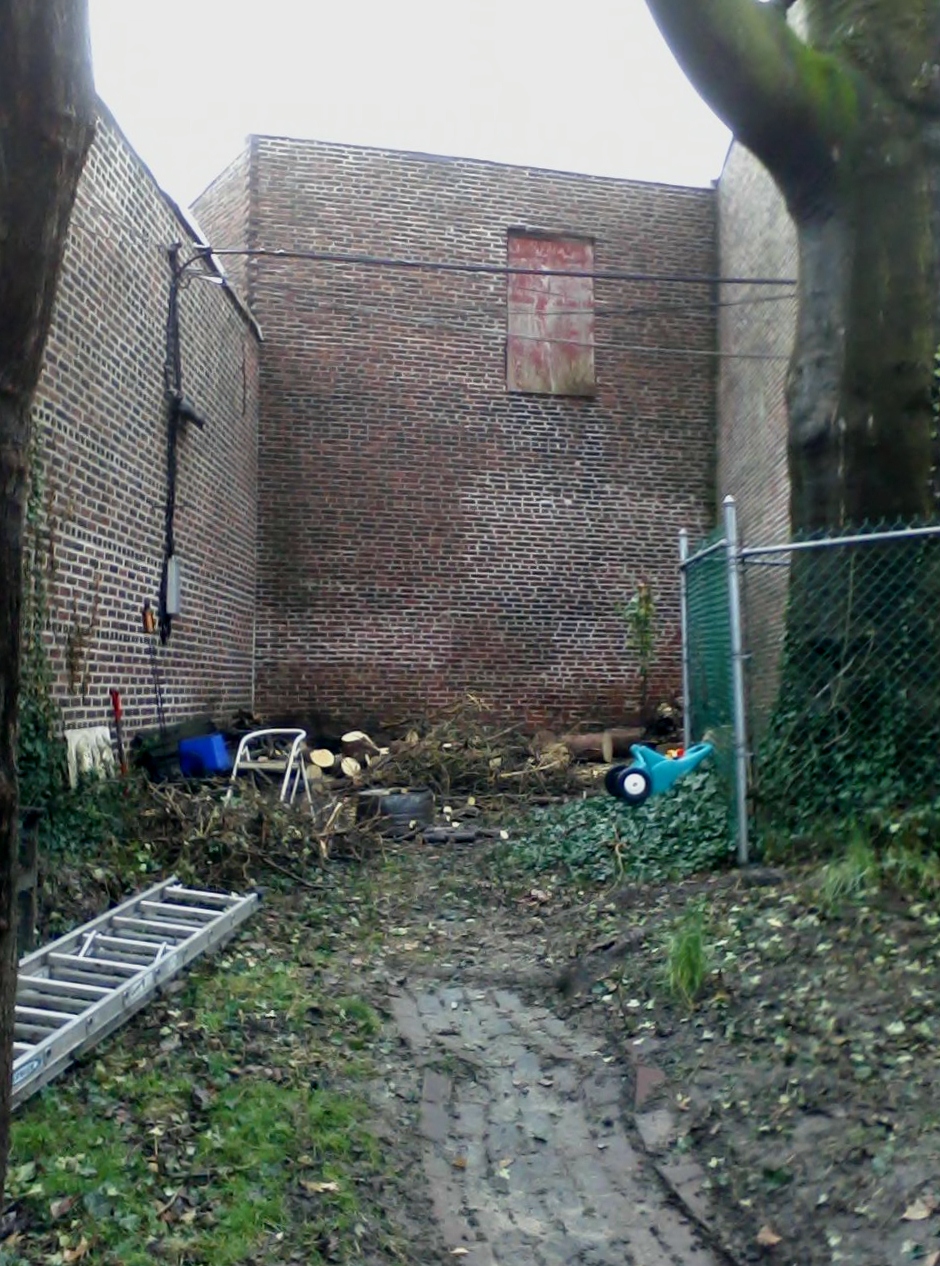
 I've been working at the garden when the weather (and mood) permits, so it looks more like this now.

My housemate Bob, who has worked on clearing this backyard in the past and who hooked me up with the possibility of it, cut down the tree in the back of the garden and has been chopping it up for firewood for the garden's planned fire pit. The brick walkway was laid by one of the owners and their tenant several years ago - I simply uncovered it. I have been doing a fair amount of excavation.
And I've done even more since this photo was taken.
The plan? A somewhat shady garden with some organic vegetable and herb growing. Something to get me some exercise, get me some fresh food, get the kid a safe space to play in and a nice place for people to hang out around a fire pit.

Monday, January 28, 2013

Painting a tree + kid

While the kid was at preschool today I started an oil painting of a photograph I took of her and a tree in the neighborhood park. I took the photo with the intention of painting it - I was fascinated by the colors and texture of the bark - and of course, V. got in several of the shots. When I reviewed them later, i found that I really liked the composition of one of them. So my tree painting became a tree and kid painting, after all. I paint in sessions - spurts, I guess. It's difficult to do it when the kid is home, so when she is a preschool I paint. Today was Session 1, and hopefully soon, there will be a Session 2.

Raw beginning of Session 1
I like to take photographs of the paintings I do as I go as a way to gain perspective. It looks different in a photograph on the computer screen. This is sometimes good, sometimes bad. It helps me find the adjustments I need to make and also, alas, to know when to stop for the day because it's getting worse, not better.
A little progress
I should have stopped here for the day.
But I went on.
I hung it on my wall where I think V. won't touch it, but where I will see it so that I don't just back burner it and never finish it. I'm already itching to work on it some more, but the kid is home now (and literally on my back as I type this!) so I will have to wait until she is asleep... and hopefully I have the energy to not simply join her in slumberland.

Friday, January 25, 2013

Stovetop bread

I'm finding myself in the unusual position lately of not having a functional oven, and having no realistic hope in sight of it ever being repaired. This is a real shame, because I like to bake.

So this morning I experimented with making stove top bread. Yesterday, I started a batch of yeast dough, and let it sit overnight. To say it rose in this sub-freezing weather in this inadequately heated old leviathan of a house would be an exaggeration. It moved a bit, like it wanted to rise, (this yeast is fresh!) but it was really just too cold. Next time, I'm going to have to strategize a bit about where it can sit that is a bit warm... where ever that is!
I made the pieces of dough into palm-sized patties and fried them in butter. Which was my second mistake, other than the rising issue, because they turned out too thick. Next time I'm rolling them out.

At least there was good pan that didn't stick!
Not that V. minded. She was more than prepared to eat the dough as it was, and even ate some of the finished product, provided it was slathered in apple butter. However, I think this little kitchen helper will be much more pleased with the next batch.
"Yum! Tastes just like unsalted play dough!"

Friday, September 14, 2012

Water bottle sling

I was out enjoying the sun this summer and got the idea for this water bottle sling/bag. (Alas, my pictures are not very good, because I am still working with a camera phone!)

I used your basic cotton crochet thread, in a natural color. I had a lot of it, and I was concerned that if I chose a colored yarn that the color would bleed on my sweaty shoulder. Also, if it does get dirty on a outing, I can bleach it. Here are some basic instructions for making one of your own. I am going to assume you already have a passing understanding of crochet, such as what a sc (single crochet) or dc (double crochet) are, and how to join to work in the round, etc. To increase, I worked 2 into one space, and to decrease, I didn't skip a space, but used an "invisible decrease".

NOTEYou will not regret counting your stitches as you go, even when making the base. It is extremely easy to add or subtract a stitch without realizing it, depending on how you begin and end your rows.

Choose your bottle and yarn. 

I have a large CamelBak, and I used a size 20 or 30 crochet thread - it was lightest weight available in the store, and worked up comfortably on a #1 steel crochet hook. But really, you could use any yarn or water bottle or some such, following my general directions.

The base.
I based this design on multiples of 6. I chained 6 and joined to work in the round for added strength, since this is where all the weight will be resting, but you could use a slip knot if that works better for you. (This option my be particularly desirable if you are using a heavier yarn, such as kitchen cotton.) Then, I worked 12 dc into the circle. (If you are using a heavier yarn, you may wish to begin with 6 dc. Do whatever is most comfortable.) I did not work on a spiraling fashion, but joined the end of each row with a slip stitch and chained 3 sts to act as my first dc of each row.

I then increased by 6 dc every row, staggering the increases so that they do not stack on top of each other. (This way, I had more a of regular circle, instead of something with flat sides.) I used my water bottle to determine how large to make the base, stopping just short of the water bottle's actual diameter. (I expect the sling/bag to stretch with use, and it did; so the initial fitting should be snug.) I then worked without increasing for about an inch.

The Body

I had 72 spaces/stitches at this point. The filet (mesh) stitch I used is a multiple of 2, but you could use any stitch you desire that divides evenly into the number of spaces/stitches you have. My filet (mesh) is worked as follows, if you are not entirely familiar with it:

To start row, ch 4. Skip one space, then *dc into the next space, ch 1, repeat from * to end of row. Slip st into top of the ch 4 to end row. 

I worked 30 rows, then began working in solid dc again for about an inch. This brought me to about a half inch from the top of my water bottle's cap, but in retrospect, if I were to make this again I would stop far short of the cap to account for stretching.

Before use, this opening was an inch or so lower. You can also see the sc edging fairly well in this photo.
The straps

I decided against a buckle or anything on my straps and simply made them long enough to be worn crosswise over my body, and about an inch wide so that I could knot them easily if they stretched out too much. You may wish to incorporate a D-ring or something, depending on your tastes.

I worked a kind of inverted V using half the number of stitches/spaces. Since I was still working with 72 spaces/stitches (careful counting of rows as I worked!), my V began 36 sts wide. I started with a decrease at the beginning and end of the row, turned and worked one row even, and then repeated the process over again (decreasing two sts total every other row) until I had about an inch of stitches left. I used a tape measure to determine how long I would want my strap to be according to where I wanted the bottle to rest on my hip. Once again, I am going to stress that fabric stretches, especially with water weight. You may wish to subtract a couple inches from your strap length to take this into account. The second V on other side of the bottle sling/bag should be as long as the first, so be sure to account for that, as well. When you are certain you know how long your strap should be, work it. The second inverted V is simply a reversal of the process: increase at the beginning and end of every other row until you have the same number of sts as you began with (in my case, 36 sts) and then join it to base. 


I joined my second inverted V using sc sts so that I didn't need to break the thread, but you may wish to break it and sew it on. The sc method leaves a small ridge of the inside of the sling/bag, but like I just noted, it means I did not break the thread, and can therefore continue on with the edging without joining thread to the work.

The Edging.

I like a finished-looking piece. To acheive this, I worked a sc edging all the was around the sides of the strap and inverted V's, beginning at the valley where I ended my sc join of the second inverted V to the body of the sling/bag. I did not count sts, but simply placed them at whatever spacing laid well. When I had worked all the way around, I cut the thread and wove it in, then joined it to the other valley and repeated the process. I damped the work a bit, squeezed the water out, then laid it flat to dry so that everything had chance to settle a bit, and I was done.

Thursday, August 23, 2012

Neighborhood Murals

Philly is a city big on murals.Personally, I think this is because there are so many row houses that have been demolished, leaving blank sides, like amputated limbs. They get stuccoed over and often a mural gets put up on it. Some are good, some are bad, some are high  end and others are more DIY.

This is a pair that I pass every day on Baltimore Ave. The people in them are real people who live in the neighborhood. They face each other across a parking lot where a house used to be. (Click on the images to enlarge if you would like a closer look.)
About the mural
East mural
West mural
I was carrying V. when I took these photos this morning. I still feel like napping half the day away, I'm so exhausted, and instead of getting up at 6:30 AM like I am accustomed to, I am up about 10 AM. I get to bed really late. But as far as endurance toddler carrying, I am getting stronger. It takes about four blocks now for me to start feeling put upon - which means I can walk V. about four blocks, stop for coffee (or the playground) and then usually carry her back. I'm not sure if her endurance is building, but she certainly is learning to hold on better for a piggy back ride.