Monday, March 26, 2012

Pig-Headedness

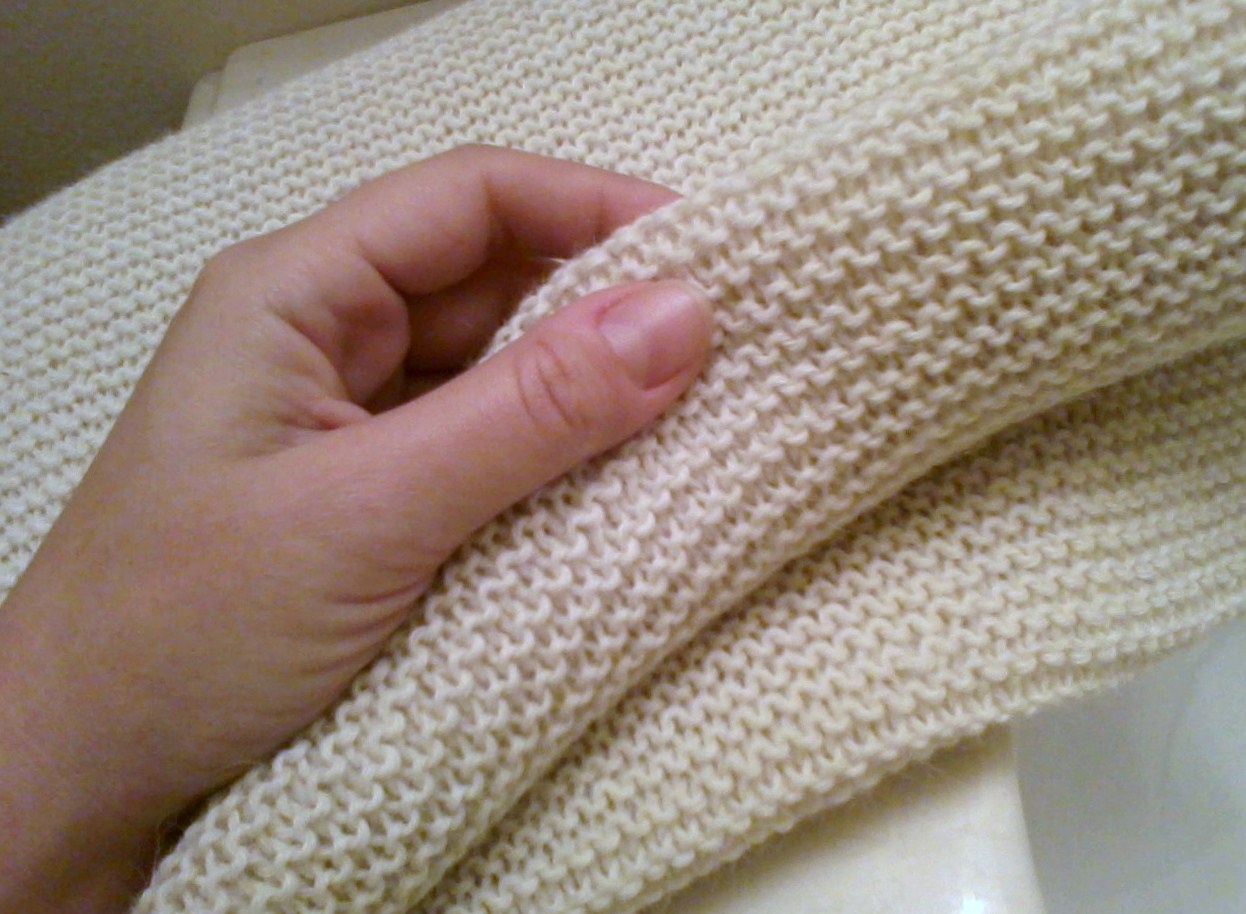
Here's a better picture of the garter stitch WWI Scarf I finished this weekend:
I've always found it interesting that garter stitch was so popular near the beginning of the 20th century. It's easy to see why - when knitting flat, you just knit the whole way, it is one of the simplest stitch patterns possible. However, it uses a lot of yarn and it can get very, very monotonous... yet it remained popular.

Bed Socks
I'm reviving a UFO that I started back when I was pregnant, a pair of Bed Socks from Nancy Bush's Knitting Vintage Sicks in a purple variegated alpaca sock yarn.
I'm knitting them for my Grandma, who has been hinting for a while now about wanting another pair of hand knit socks. I'm using my new resolve to reduce stash by knitting it up to finally get these socks back on the needles and then out the door.

I had, of course, forgotten since I last knit a pair of these socks that there is an annoying *yo, k3tog, yo...* that happens every four rows. K3tog is NOT FUN. Especially not with splitty yarn. But I will perservere through pig-headedness once again!

Sunday, March 25, 2012

WWI Scarf

Recently I've been delving a bit more into historical knitting and found a free online e-book about knitting for soldiers during WWI called "Knitting and Sewing: How to Make Seventy Useful Articles for Men in the Army and Navy" by Maud Churchill Nicoll (1918) (Ravelry link; direct link to ebook pdf.)

I've started with the "scarf", pg. 43.
The scarf drying on my newly scrubbed bathroom floor
The scarf is extremely simple - garter stitch all the way - with an option for using fingering weight yarn, or a dk/sport weight yarn. Not feeling like making it a HUGE commitment, I opted for dk weight, esp. since I found a good yarn for a reasonable price at my LYS.

Since the stitch and styling is so generic, I strove to make it more authentic by trying to achieve proper gauge and, more importantly, using a plausible yarn. This pattern called for "Thibetan Llama Wool", so I opted for using llama. I've never sought out llama yarn before, and an internet search was kind of depressing me, but then I lucked out. My LYS had some Plymouth Yarn Co. Dye For Me Baby Llama DK in the basement. (It only took two skeins to make this scarf, which is about 636 yds (542 meters)... you know how garter stitch really eats up the yarn!) The pattern calls for using either khaki, navy, or a natural color, and this being undyed yarn, it's "natural" color as far as I'm concerned. I'm not sure if there's a massive difference between baby llama and adult llama wool, but baby llama basically feels and works like alpaca. The pattern said it would make a soft scarf, and it certainly is, so good enough.

There wasn't a lot of variation to entertain me with this scarf - no color changes, or stitch patterns, so I essentially got through this project on willpower and pig-headedness, which I fortunately have in abundance. (Well, at least as far as the pig-headedness is concerned.) According to my rough calculations (CO 52 sts, 50 ridges = 12 inches, 1 ridge = 2 rows, total scarf length = 72 inches) I knit 31,200 sts. I believe a sweater is something around 50,000. So, this project is not quite quickie mittens, nor a sweater, but something in-between.

Thursday, February 09, 2012

Quickie Baby Hat

I whipped up this toddler beanie out of some Malabrigo I had in my stash as an esty item to sell:
It's just a basic worked in the round, drawn-together top beanie. I embellished it with some embroidery in another brand of single-ply knitting yarn with a leaf, since the color scheme seemed autumnal to me.
Below you can see the drawn-together top:
I'm not a big fan of drawn-together tops, but they are good for getting a general fit, rather than very specific, more tailored one. And that's kind of important with toddler heads. :P

I've been thinking a lot lately about hat sizing, and bonnet sizing. Usually, it's just head circumference and sometimes hat depth given, but how to determine hat depth was always a puzzler for me. I think I may have finally figured it out: measure from ear to ear (either below ear, or whatnot, depending on the intended fit) and then divide by 2, and consider ease. Bonnets are a bit trickier, I think, but I've been feeling bound and determined lately to figure out some standardized sizing chart for bonnet making.

Monday, January 30, 2012

Cups and mugs

I made several mugs and cups beyond the sake cup from yesterday, but I only kept a few. I gave most of them away.

The mug you see here was an early attempt; it's very heavy, both in weight and in glaze.
This tea cup is purposefully handle free, and had its rim dipped in a glaze called "waterfall". I rather like the effect. I use this mug almost daily. It was a precursor to the porcelain, done in Danish Plain. I made another one that looks much like it in porcelain that I gave away.
The inside of the tea cup.

Top of my best "form". The glaze on this mug was an utter failure. But as my last thrown mug, it's shape was far better than the others. It's not too heavy and the walls are fairly consistent in thickness.
Here you can see the horrible glazing. I went from being too heavy-handed with my glazing to being far too light. It would have been a great mug otherwise.
Here you see the bottom. Notice the nice shaping at the bottom of the handle?
Another handle free tea cup.It's much heavier than the one above.Still very usable, as you can see.

Thursday, January 19, 2012

Some Ceramics

I took a beginner's wheel ceramics class last year. I always wanted to learn ceramics, but the last time I handled clay was in 1995 when I took a sculpture class. I was fairly good at it, but transporting my projects without a car was sheer hell. I didn't have a car again and an inclination to pursue a class until lately.

I'm not used to things being very difficult. Motivation is difficult for me, not execution, I find. Therefore I was practically traumatized the first half of my first class by how hard wheel ceramics was turning out to be. (No pun intended. :P) Also, it's messy. Me and messy aren't really friends, I don't care if you've seen my closet. I don't like my hands gooey. So I was having a near OCD experience, as well. I had to get over that... for the most part.

By the second day I had it well enough for my blood pressure to drop back to it's normal low. (Maybe that's why get-up-and-go is a problem for me... my blood pressure usually causes nurses to say, "How do you feel? Are you tired? Do you mind if we try this again?")

I started with Danish Sand, which has a neighbor called Danish Plain, who is sand-free. I went this route instead of more earthy clay because I made it clear to the instructor from the get-go that my aim was porcelain. I love Asian pottery. I would be thrilled to make a perfect celadon bowl. If I started with Danish Sand and then moved on to Danish Plain he thought I would be fairly well prepared for the feel of porcelain.
Three small pieces: brown bowl, white bowl, and sake cup

Bowl of Danish Plain clay, about 3" wide
My best piece is the porcelain sake cup I made near the end. I am both frugal and stubborn, and I have small hands, so I was not daunted at all by trying small pieces. It's about 1 1/2" in diameter.
Inside view of sake cup. This is fairly true to color - it's greenish.

Bottom of sake cup. The footing on this is about 1/8" wide. The outer graze is blue-gray.
After I used up the Danish clay, I got some coarser clay to try to knock out some quick pieces. This bowl was one result. I was unhappy with how it trimmed up, so I did some carving on it to cover it up. The glaze dripped a bit, but at least it dripped consistently. :P
Earthenware bowl, about 4" wide

Bottom of earthenware bowl
There are more pieces as well, but I don't want to inundate the blog with photos all in one sitting. More on the other pieces later.

Monday, January 16, 2012

Second layer

Progress on the paper mache so far:

Finch
Bowl
Not a lot of visible progress, but it's a somewhat slow process because I need the layer to dry adequately.

On the knitting front
I've started making an alpaca/merino wool cream colored hat in a somewhat cloche style. I'll probably have to knit it once, try it on, then knit it right. :)

Saturday, January 14, 2012

Art from Crap

Er... I mean, from rubbish.

Since I don't have a pottery wheel or an art studio or anything glamorous like that, if I feel like sculpting I have to go very unspecialized. As in paper mache. It's hard to get less specialized than paper, flour, and water.
You may be wondering what Aldous Huxley's Brave New World has to do with paper mache. Alas, very little! I was thinning my herd of books and it is the one to go down for the benefit of the rest. It would have gone to a thrift store except it's basically falling apart, it's so old. And value in old books really only exists if they are signed or first editions or some such - not a cheap 1960's paperback. However, I am going to go ahead and try to play it off like I meant to use A Brave New World - that somehow makes it more artistic: pretense. :P
I am molding it around a plastic Christmas ornament that I got for 25 cents at the local Goodwill Outlet store. Did I mention this craft is also cheap?
And I'm making a finch. I just like finches. They are cute little noisemakers.
It'll all come to together in the end. I hope.

Friday, January 13, 2012

Vintage Baby Jacket Sans Playsuit

It's been a while, but hello! I'm back. :)

You really don't want to know what I've been eating today. It's one of those days. Onward to knitting!

Vintage Baby Jacket
This knit is from the Rock-a-Bye Baby Book by Columbia Minerva, which you see below. The green outfit that little boy is wearing is what I made, with some qualifiers:
  • I did NOT use Columbia-Minerva Quick Knit Baby Yarn, as the pattern suggests, because much like you good folk are no doubt also suspecting, a book with a cover price of 60 cents may not be massively current. I'm pretty sure that yarn is discontinued, but I'm more than willing to be corrected on that point. I used some Berroco Comfort DK in a cream color that was left over from old baby projects, since a gauge of 6sts = 1" was needed on Size 6 needles.
  • This pattern is a jacket and playsuit set. I did not make the playsuit. 
Aside from that, it's all pretty much as the pattern calls for. (Which, by the way, is incredibly simple!) 
I'm quite happy with the result, here:

I found the buttons by accident at a clearance fabric store. I bought them in two sizes because I didn't have the jacket with me to size the buttons. I didn't regret it. I was delayed for quite some time in finishing this project for lack of good buttons, and now I have them, and some to spare.

This isn't the only Columbia Minerva pattern I've done up. You may recall that I made a lacy baby jacket in black Caron Simply soft, and a mock cable baby cardigan out of some leftover burgundy Encore worsted. And I doubt this will be the last pattern. I highly recommend this book to anyone who can get their greedy little hands on it. Although you may not be as lucky as to spend only 60 cents on it anymore.


Wednesday, April 20, 2011

Dancing Robot Socks

This is part of an ongoing project I've been working on:
I was on a mosaic knitting kick and thought I'd try my hand at a robot design. I got this far before I realized that my asymmetric little dancing dude didn't transition well into the foot of the sock. Oh, dismay!

So I have to start over. And in a smaller gauge, I think. Something in light fingering, on #1 US needles, or smaller. I don't want to lose detail!

Tuesday, April 19, 2011

Bootie Time!

I've been on a bootie kick lately, thinking about how such seemly fundamental knits are, in fact, often quite devious. I'm determined to crack them.

I'm starting with a vintage bootie from one of my magazines:
They seem like a no-frills, garter stitch affair, but their construction reminds me a bit of folding origami.
With these, I started by casting on for the center of the sole, then shaped for the heel. (That's the slight rounding you see at either bottom, outer corner.) The zigzagging along the top is shaping for the toe, and the space at center bottom is for the ankle. You can see in the first photo that I've started the ankle, which is made by picking up stitches around that ankle inlet and working flat.

I foresee a certain amount of seaming in my future.

Sunday, February 13, 2011

More Plarn

Lately I've been trying to get back in touch with my inner artist (as opposed to craftsperson, although I know the two aren't exactly separated) by experimenting with recycled media. I've been dabbling in paper mache, and of course, with plarn:This is actually a tiny bowl I made from one Radio Shack bag. I really like it's rough texture and it's delicacy.
The only drawback to it is that it truly is functionless art, even though it is in the shape of a bowl. Theoretically, I could put something in it, but it would be far from practical.

Little Monsters

I made these two little monsters from split vintage Orlon acrylic yarn that I got from my grandma's hoard. They're about 1 1/2 inches long - tiny! I made them into pins, and I was on a real monster-making bender, but nobody but me seemed to really be interested in them.
I like their expressions - one button eye, wide open, a squinty eye and lopsided fangs. They make me smile. Maybe I will make more of them...

Thursday, February 10, 2011

My First Plarn

Are you familiar with plarn? Living this modern life, I find I am inundated with plastic bags, whether it be from the grocery store or the local thrift store. There a re some practical household uses for them, but trash can lining doesn't eat them nearly as fast as making plarn.

This is my first plarn project - a small (about 6 inches across at the base) crocheted basket. I find plarn (at least the kind I was using with this) is not unlike working with stretchy raffia. The texture and visual effect is similar. There's a certain amount of rigidity - because it's crochet - but it's also very pliable. (I don't know what kind of tensile strength it has, but I hope to find out in the future.) Despite its pliability, it is a bit hard on the hands, like cotton yarn. I have more projects in the works - coming soon!

Wednesday, November 17, 2010

Basic Baby Bunny Hat

This hat is based on a simple hat V. had when she was an infant. I liked it so much that I've made this knitted version from recycled cashmere. It's extremely simple. This version is to fit a baby with an 18 inch head (about 12 - 18 months old) - but this pattern is so simple that if you need a smaller or larger hat you can just add or subtract multiples of 4 stitches for the desired size, or even use a different gauge!

(I have plans to add ear flaps to this! When I do, I'll add a link to the instructions.)
Basic Baby Bunny Hat

Size:
12- 18 months (16 inch circumference unstretched, fits 18 inch head)

Yarn:
any worsted weight that meets desired gauge

Gauge: 4.5 sts = 1 inch (2.5 cm)

Needles: US #9, or size needed to obtain desired gauge

Abbreviations:
k - knit
k2tog - knit two stitches together
skp - slip one stitch, knit one stitch, pass slipped stitch over knitted stitch

MAIN
CO 68, join to work in round, being careful not to twist.

Work 3 ridges in garter stitch.

Knit in stocking stitch until piece measures 5 inches from cast-on edge.

EARS
K34, place remaining 34 sts on waste yarn or needle holder. (34 sts now on needles for working in the round)

Decreasing:
*K2tog, k to 2 sts before end of round, skp. K one round, repeat from * until 4 sts remain.
K2tog, skp, k2tog, cut yarn and weave in end. First ear completed!

Place stitches from waste yarn onto needles for working in the round and join yarn near first ear, making sure to leave about a 4 inch tail to use later to weave in gap between ears. With RS facing, k one round.

Work decreasing as for first ear. Second ear completed!

Use that joined yarn tail to close up any gap there might be be between the ears. Weave in all ends. You're done!

Wednesday, September 29, 2010

Obstacles, obstacles!

It's amazing how difficult it can be to make one, teeny weeny blog post a day, Monday through Friday. Camera issues aside, even getting the text down in black and white and various highlighted colors (depending on my mood) can be quite a hurdle. How, you may ask, am I at the moment accomplishing this feat which I claim is so difficult? Well, the answer to that is simple. i do two things:

1) Leave the house with the laptop and go to a free WiFi hotspot, sans bebe; and,

2) Try not to panic.

#2 is the hardest part. I've got a lot on my mind, the least of which is getting a new camera. It turns out I need one. I could send my old Nikon Coolpix that I got for architectural school to Nikon USA for repairs - that is, if I'd kept the receipt. Because they require proof of purchase to do repairs, even without a warranty. I bought this gosh darn camera back in... 2005? 2006? Maybe 2007. In Cambridge, Massachusetts. I'm now in California. And I don't care how organized you think you are, I'm pretty well organized, too, but it hadn't occurred to me in thousand years that I would need to move that receipt with me 2,000+ miles. I brought the cat, I brought yarn, I brought books and art. I even got a giant unfinished landscape painting canvas mailed to me. But no camera receipt.

So, what's a person to do? Well, I'm going to cruise across the street to my friendly neighborhood electrics store and see what they have on offer. Because it is hard to function without a camera. One so many, many levels. For goodness sake, I have a 15-month-old! She tries to stand on her head! So many photo opportunities missed!

Thursday, August 26, 2010

Vintage Thursday - Cabled Baby Cardigan UFO

The hope is that this will not be a UFO forever. In the grand scheme of things, it has not in fact been a UFO for very long - maybe four months. It's from this booklet, which you may recall I have mentioned before:Unfortunately, I don't have close up of the page in question at the moment. It would involve a lot of digging through boxes (and a waking of the baby) to disgorge it from my piles of stuff. (I moved recently - I'm not that bad of a slob. Really.) So, until I get it out and scan it for your viewing pleasure, I'll simply tell you that it's a hooded cardigan with a cable running up either sleeve. Very simple, actually. I'm undecided whether to include the hood, or to make a collar, but I did decide to make it out of Caron Simply Soft in the whitest of whites. I wanted V. to have a good, very washable, white cardi that could coordinate with practically anything.
But because I can't leave plain very well alone, I'm added Peter Rabbit buttons:
Aren't those almost too cute for words? I nearly had every button different, but the fact that I would have to repeat Peter Rabbit (posed differently, but still very much Peter Rabbit, rather than another character) I nixed it and stuck with this one.

This project was delayed by the moving, and was supplanted by the garter stitch scarf. Foolish, foolish me.

Tuesday, August 24, 2010

Bunny hat progress

Ever have everything be so hectic around you that doing something simple - something that is really and truly a no-brainer - takes you days and days and many a ripping out? That's me with this bunny hat. Originally, I started with the scarf part, thinking, "Wouldn't it be great to simply knit up from the scarf to the crown?" But then I had head size issues, to say the least. (You'd think I didn't know how to check gauge!) Then I started to think about how spiffy it would be to be able to make the hat with or without the scarf part, depending on your taste. So RIP! it all went again. And then I cast on too many stitches. I think that had something to do with trying to count while watching an active toddler and listening to a lecture on psychology on YouTube while, of course, the husband tries to give running commentary on a tangential idea. (Really - how could I cast on wrong int hat situation? Silly me!) Naturally, I only realized the mistake once I was beginning the second bunny ear and the number of stitches I was picking up didn't add up correctly.

But I am on the right path now. I grabbed about an hour - ALONE - at the coffeehouse and made a fresh start. Whoo-ee!

Tuesday, August 17, 2010

Wholey Expected Scarf Hiatus

I have been away from the hooded garter stitch scarf - hopefully (or not?) for the moment - to work on... more garter stitch. But of a more tolerable nature.
This is the cashmere sweater in a state of being recycled. The winter accessories I knit V have been so successful that I got the idea of trying to take them a step or so further. Cashmere is a natural step up for almost any pattern, of course. But I'm talking structurally. The main flaw in the hat and scarf I made V. is that they are a hat and scarf, rather than a hat/scarf. That is, it would be better if the scarf was attached. I suppose I could just make the toasty topper from knitty, but I like how the scarf I made tucks rather than ties. Plus, I've been planning a bunny hat for some time now, and this is finally my chance. Yes, that's right! This is going to be a tied-on bunny hat. A simple one.

But it won't be all garter stitch.

Friday, August 13, 2010

The Holy Grail and the Fountain of Youth, Too!

You hear about people making amazing discoveries. You see them post about finding Alice Starmore books at thrift stores for US$2, or buying a cashmere sweater at their local Goodwill for $1 every other week. It happens to other people, on other blogs, other people who live in charmed places where no one knows the value of what they are practically giving away.

Whoo-hoo! It is now my turn!

Guess what I got at a yard sale on the way home today? Yep - bone crochet hooks! My dad is somewhat of an expert on bone, and he took a good look at them for me. He thinks most of them are some kind of antler. But the second one down from the top - the one that's plainer than the others - is ivory. Normally he'd be able to tell me what kind of ivory, but he's not sure if it's elephant or narwhal tusk, etc. He is sure it was cut with a fine saw, etc. My dad is a junkhound. (Scroll down to see his old bottles and rocks.) Especially when it's old junk. So he was almost as excited as me. I need to do more research, but I'm pretty sure these hooks are turn of the century. And I paid US$2.50 for each of them. :P

Oh, and that background fabric? That's just a 100% cashmere sweater I found at the local thrift store a couple days ago for US$5.00. Looks terrible on me, but has a lot of recycling potential.

Vintage Thursday - Knee Socks

Do you have any really, really old UFO's hanging around? I mean really old. So old you forgot you started them, and are startled to see them one afternoon as you're cleaning out your closet? And I'm not talking last year or five years ago old. I'm talking so old that you know you won't finish them in your lifetime because, well, you're 84 and knitting is no longer paramount in your daily schedule.

Witness the 47 year old UFO.
My grandmother was knitting these knee high lacy socks for my aunt Susie, who is now a grandmother herself. The pattern book is from 1964.
That's right - my grandma is an organized hoarder, as they say in my family (aka pack rat) and not only was the sock tidily stowed away in a zip-lock bag, but it included the pattern book and the remaining yarn. No needles, though. But I think I can manage.The book calls them "Lace-Knit Knee Socks B-644". (Vintage patterns have such romantic titles, don't they? :P) Naturally, I called dibs on the UFO. It's knitted flat and then seamed up the sole, heel and calf. Apparently the yarn is Coats & Clarks Red Heart Wintuk Sport Yarn. I'm trying to imagine what is was like to be a live in an era when sport weight acrylic (possibly Orlon!) knee highs seemed like a fantastic idea. But then I've seen enough vintage knitting patterns to not be shocked by much. (Have you seen these ski masks? Believe me, they are real. I have the magazine that features them. Fortunately, they are wedged in between some perfectly decent patterns. So you know not all hope was lost. But still the question rages - why? Why feature them at all?)

I am determined to finish the knee socks. They may be too big for me - my aunt Susie is nearly six feet tall, and I'm, well, almost a foot shy of that - but we'll see what happens. I may be able to swing it. Or just frame them and hang them on my wall. Either way, I hope my aunt Susie doesn't have any expectations. :P