Wednesday, August 11, 2010

Zigzag Pattern - Written Beta

I begin this post with a warning - this is not the final write-up. This is my written directions for what should probably be a charted pattern. If you try to knit this, you basically will be test knitting. I have added changes based on feedback in red. Please let me know if these changes are helpful or confusing.

In which case, please let me know if you do embark upon such a quest, and what pitfalls you encounter. And ask me questions if you feel the need - I will answer ASAP. Thanks!

(Changes in pattern will be in red.)
SIZE
One Size

FINISHED MEASUREMENTS
Hat circumference (unstretched): 18 inches

MATERIALS

Yarn
[MC] Patons Classic Wool [100% Pure New Wool; 223 yds/ 205 m per 100g skein]; color: Natural Mix; .5 skein
[CC] Patons Classic Wool [100% Pure New Wool; 223 yds/ 205 m per 100g skein]; color: Jade Heather; .5 skein

Note: This pattern requires only about half a skein of each color, or about 110 yds/ 100m each.

Recommended needle size
[always use a needle size that gives you the gauge listed below -- every knitter's gauge is unique]
1 set(s) US #6/4.25mm double-point needles

Notions required
darning needle
stitch markers
cable needle

GAUGE
24 sts/36 rows = 4" in stockinette stitch

PATTERN NOTES

LT (Left Twist): Bring right needle behind left needle and knit into back of second stitch on left needle without dropping st from needle; knit into front of first stitch on left needle, drop both stitches from left needle.

The Long-Tail cast on method is recommended for this project.

Note on ZigZag Patern:
To maintain pattern consistency, the round in which the color changes (from MC to CC, and vice versa) always begins 1 st before the beginning of the previous round.

PATTERN
BRIM
Using long-tail method and MC, CO 120 sts onto needles.
Join to work in the round, being careful not to twist.

Round 1:
*k tbl, p1, k2, p, repeat from * to end of round.

Round 2:
*k tbl, p1, LT, P, repeat from * to end of round.

Repeat Round 1 and Round 2 until work measures 1 inch from CO edge, ending with Round 2.

BODY
Set up rounds:
Round 1: [CC] *slp, k4, repeat from * to end of round.
Round 2: [CC] *slp, k4, repeat from * to 5 sts before end of round, k4.

Main Pattern Rounds:
Round 3: [MC] *k tbl, k3, slp, repeat from * to end of round.
Round 4: [MC] *k4, slp, repeat from * to 5 sts before end of round, k4, move marker 1 st to the right.
Round 5: [CC] *k tbl, k3, slp, repeat from * to end of round.
Round 6: [CC] *k4, slp, repeat from * to 5 sts before end of round, k4, move marker 1 st to the right.

Repeat rounds 3 through 6 until the length from the cast on edge is 4 inches, ending with Round 5 [CC].
CROWN
Round 1 (set up round): [CC] *k tbl, k3, slp, place stitch marker on slipped st. K4, slp, k4, slp, k4. Repeat from * to 1 sts before end of round. (Six stitch markers placed every 20 sts.)

Round 2: [MC] * Work in pattern until 2 sts before marked stitch, slp, k1, psso, slp (marked stitch), repeat from * to end of round.(114 sts)

Round 3: Using same color yarn as previous row, * work in pattern to marked stitch, slp, repeat from * to 1 sts before end of round.

Round 4: [CC] * Work in pattern to marked stitch, k tbl, k2tog, repeat from * to end of round. Repeat Round 3. (108 sts)

Round 6: [MC] * Work in pattern until 2 sts before marked stitch,
slp, k1, psso, slp, repeat from * to end of round. Repeat Round 3. (102 sts)

Round 8: [CC] * Work in pattern to marked stitch, k tbl, k2tog, repeat from * to end of round. Repeat Round 3. (96 sts)

Round 10: [MC] * Work in pattern until 3 sts before marked stitch, slp, place next st on cable needle and bring to front, k1, psso, sl st on cable needle to right needle, slp, repeat from * to end of round. Repeat Round 3. (90 sts)

Round 12: [CC] * Work in pattern to marked stitch, k tbl, k2tog, repeat from * to end of round. Repeat Round 3.(84 sts)

Round 14: [MC] * Work in pattern until 2 sts before marked stitch, slp, k1, psso, slp, repeat from * to end of round. Repeat Round 3.(78 sts)

Repeat Rounds 12 through 16 twice. (54 sts)

Next Round: [CC] * Work in pattern to marked stitch, k tbl, k2tog, repeat from * to end of round. (48 sts)
Next Round: [CC] * Work in pattern to 2 sts before marked stitch, slp, k1, psso, k tbl, repeat from * to 1 sts before end of round. (42 sts)
Next Round: [MC] * Work in pattern to marked stitch, slp, k2tog, repeat from * to end of round. (36 sts)
Next Round: [MC] * Work in pattern to 2 sts before marked stitch, slp, k1, psso, slp, repeat from * to 1 sts before end of round. (30 sts)

Repeat the previous four rounds once more. (6 sts) Cut yarn. With darning needle, drawn yarn through remaining loops and close up crown.
FINISHING
Weave in all loose ends and lightly block (without stretching) if desired.

Zigzag

A while back I posted about a pattern I had come up with that was giving me some trouble. Well, here's the hat in question:Looks innocuous enough, doesn't it? Well, this hat has given me many a headache. Mind you, it wasn't the knitting of it that gave me the problem. It was writing it up. It's worked in the round. Notice that jog at the beginning of a new row where the colors change? No? Good. You're not supposed to, thanks to a little fiddling that is almost impossible for me at the moment to write up coherently. But I do like how the hat turned out.
I especially like the crown decreasing. That was the hardest part of this design - finding a crown decreasing that looked right to me. I didn't want to just go with a solid color or something - I thought that might be a bit of a cop out. As would modifying the look of the pattern by the decreases. I wanted it to look like the pattern was absolutely continuous, except for the ridges of teal that run between the paired decreases.Here I am in the hat.

Monday, August 09, 2010

Interminable Garter Stitch

A surreal landscape?
A leftover from a bad night out drinking?
Actually, it's neither.
It's my current WIP.
I am trying to remain faithful to it - it's a trend I've been trying to go with lately. That, and not buying more yarn. This was the last yarn I bought, about two months ago when I started this project.
(Last new yarn, because - of course! - yarn from yard sales and thrift stores and the like don't count on a yarn diet!)
(...do they?)
I started this project thinking it would be easy and relaxing. The simple brilliance of the pattern lured me in. That and the variegated silk blend yarn I'm using. But let me tell you. Should you for even a moment contemplate knitting this design - or something like it - I have a warning for you that you best heed before you stockpile or segregate the yarn:

This project - it never ends. Never ever. You will be knitting garter stitch, and knitting garter stitch, and knitting garter stitch. And knitting some garter stitch some more. Really. I say this as someone who is anticipating with pleasure doing something in 10s = 1" gauge really, really soon. (Say, as a reward for finishing this project. When I am about 84.) I look forward to this project with dread in my heart. I have almost begun a crocheted afghan merely to avoid it, based on the principle that I'm not defying my attempt at knitting monogamy if it's not knitting.

Seriously - this may drive me to tatting.

Thank goodness I'm at least using quality yarn for this project. Could you imagine how much more it would hurt if I'd cast on with something like Red Heart?

New Camera

My new camera cost US$9.99 and can hook to a key chain. I'm still sorting out how to work it, but these are the results I'm getting so far:


There's an eerie quality to these photos, me thinks. We'll have to see how it translates over into photographing knit objects.

Friday, August 06, 2010

Internet? What internet?

That has been the theme today. That and laundry. LOTS and LOTS of laundry. And now that there is finally Internet access again, I am too exhausted to post more than this.
And a gratuitous photo, of course:

Friday, July 30, 2010

The Jacket Never Worn

I'm sure that if you're reading this blog and and you have a tendency to make stuff then you probably have something you made once that seemed like a good idea at the time but didn't really work out when it became reality. And it might not have really been so much your fault - you didn't wildly substitute yarn, you followed the instructions (even if it meant frogging half the back, like I did with this one), and you even checked out how other people fared with it to see if you might have overlooked something you might get blindsided with later. But still, something went wrong, because you either don't like it or can't use it. In the end the project was just process knitting, even though it was supposed to be worn.

That's what happened to my Bianca's Jacket. I substituted some discontinued sky blue Katia Fanny from my stash for Muench Yarns Sir Galli - a reasonable substitution, IMO - and I used recycled buttons. I started it while on maternity leave and thought it would be a good nursing sweater.
It turned out beautifully, although these photos are crap.
So what was the problem, you ask?

Well, there were two. The first was the buttoned yoke. I prefer things to button around the bust line, which is why I usually make v-necked cardigans. But the photo in the magazine was so beguiling that I ignored this tendency of mine. The second was more unfortunate. The jacket was highly unflattering to my figure. And when I say my figure, I just don't mean my immediately postpartum figure. I mean I've tried this jacket on over and over again as the weight was nursed away, and every time it looked horrible. Swing jackets - especially short ones like this - should never, ever be worn by me. It made 130 lbs look like 230 lbs. (Much like every camera lately. What is with that? Am I retaining water in the face and everyone's too polite to say?)

I gave the jacket to my MIL.

On Another Note

I get all kinds of yarn-related emails, including Berroco KnitBits. Now, when I first noticed Berroco, their stuff was so fugly I found it challenging. Since they've hired Norah Gaughan, though, they've undergone a kind of sea change. This morning I got the link to the audio slide show presentation of Booklet #301 Berroco Campus (press MUTE and you'll enjoy it much more) and I found that about 80% of it I would actually knit/wear. Especially now. It's the end of July and it's 54 degrees Fahrenheit outside. Oh, coastal California!

Thursday, July 29, 2010

Vintage Thursday - Lacy Baby Jacket

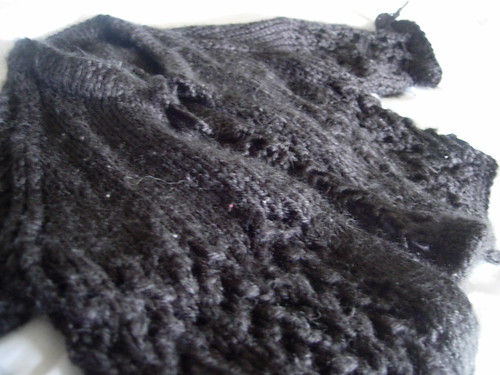
I'm pleased to present another knit from the Columbia Minerva Rock-a-Bye Baby book that I introduced last Thursday. This little jacket also came in a set - I could have made a matching blanket (you can see a bit of it in the upper right hand side of this picture) and a bonnet, but I only wanted the jacket.

Yarn: Caron Simply Soft in black

I have difficulty photographing black. These pictures make the jacket look a little faded - but that's actually sheen. And you can't really see the detail of the laciness very well, either. That's partly because the yarn I used was very soft (hence the name "Simply Soft") and partly because it's an acrylic, and as you know, acrylics don't tidily block.
Nevertheless I'm very happy with this knit (it looks better in person!). I chose this yarn because I wanted something hard-wearing like acrylic but I didn't want it to be scratchy. I was introduced to Caron Simply Soft by Vegan Pi several years back when I lived in Boston as a vegan option, but aside from it's vegan-ness, it lives up to it's name and washes well. I'd chose it over some wool blends on the market. The openness of this pattern also meant that the yarn being 100% synthetic wouldn't be a big deal, since there'd be plenty of ventilation.

Saturday, July 24, 2010

Home Again

I'm in the process of moving back to my home town. I'm driven mainly by the current economic situation and by the abundance of family up there. But there is some appeal in other areas.

The walk down to the beach.
A blackbird in the briars.

The beach. It's a lot warmer than it looks.
My husband looking at the beach. :P
Me and V.

Thursday, July 22, 2010

Vintage Thursday - Mock Cable Baby Cardigan

I've got this idea (since I have so many vintage patterns - and use them) of having one day a week dedicated to something vintage. I have randomly selected Thursday.

Knitting Vintage for V.

I got a whole slew of knitting magazines from my grandma that ranged from 1944 to the mid-1980's. Some of them are interesting just to see the amazing fashion differences between then and now (like anything from 1975. Really. What were they thinking?), but my favorites are the baby patterns from when my dad and his siblings were little. I have about five of them, and this is one of them:

It's got a good variety of patterns, as you can see below (click to enlarge):

I particularly liked this Mock Cable Baby Cardigan. It calls for a worsted weight yarn, and comes with a matching bonnet and blanket, but I skipped those.


I used some burgundy Encore I had left over from the Nursing Sweater I made Sibling #5. I had left over buttons to match, too.

V. seemed to like it.

Tuesday, July 20, 2010

Winter Baby Accessories

I've gotten on a bit of a fine gauge knitting kick lately, and part of the result is this set of accessories I made for V. for next winter.


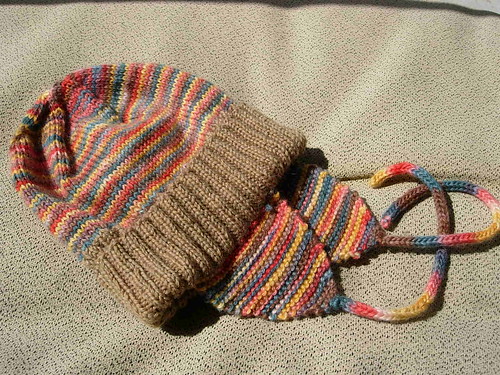
Pattern: b18-5 Hat from Drops Design

Yarn: KnitPicks Stroll in Buckskin, unknown hand-painted merino sock yarn from a bargain bag from Paradise Fibers (something which I did on a whim when I was first pregnant, and would do again - the yarn I got was awesome! But alas! this skein did not have a label. )

Needles: Size US 2

This hat is a winner. Everywhere I go, everyone loves it. And most of them are gobsmacked that it was hand knit. (I think that's because of the gauge.) The brim folds in half, so it's actually twice as long as it looks in the photo. It took what seemed like forever to knit that many rows of ribbing in a tan fingering weight yarn, let me tell you. But the tediousness was so worth it. Check it out:
If I were to make this hat again (and I might!) the one thing I would do differently would be to place scrap yarn in the stitches meant to be picked up to knit the ear flaps. Picking up 20 or 30 stitches all on the same row is one thing at this gauge, but needing to do it again so that everything is balanced and straight! ...Well, let's just say I learned. (I had brief, flickering moment where I thought knitting the ear flaps by picking up stitches was a hair brained idea, until I saw the results and got to use the hat. Doing it this way means the ribbing can be folded down for extra ear coverage on really cold days. Those Swedish know their hats!)

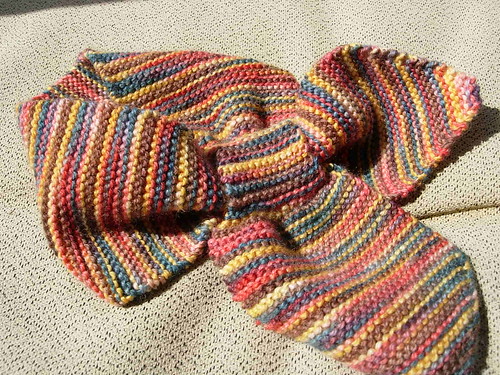
Since I had such a cute hat, I needed a cute scarf.


Pattern: B14-16 scarf (Gotta love those imaginative names Drops uses for their designs, eh?)

Yarn: Same anonymous hand-painted fingering weight merino yarn as I used for the hat.

I love, love, love this scarf. It was an easy knit and a rather clever one, too. It's in cinch to get it on the baby, too, because I don't need to tie or button it. I just slip the end through the hole. I like how it mimics the garter stitch styling of the hat as well - it looks like they were meant to go together.

These mittens are in the same pattern as the scarf:

They're not done. All I need to do is add the thumbs, but by the time I had two of them I was a bit burnt out on the whole accessories project. I might finish them one day, but by then they'd probably be for a younger brother or sister to V., and not V. herself. Such is life!

Monday, July 19, 2010

Oh, where have all my hand-knit socks gone? (Long time darning...)

While I was pregnant I had to give up on wearing my hand-knit socks because my feet were either 1) too swollen to accommodate their snugness, or 2) too substantial for my shoes to accommodate both my swollen feet and the socks in them. Before long I had to give up the shoes as well (and I still, at eight months postpartum, had flip flop tan lines as proof) and what with all the baby stuff knitting, sock knitting hasn't exactly been foremost on my mind. I confess I have been mainly sporting the thin dollar store sport anklets I got as emergency winter back-ups during the pregnancy, which may have actually saved the four or so pairs of hand knit socks I have from being worn to death.

Witness the (scanned) heel of my cabled red socks.

I knit these socks while I still lived in Boston to replace my obnoxiously red factory made socks that had died an honorable and very final death via my constantly, constantly wearing them. The cabled red socks suffered from a slight miscalculation - they were too loose - but that did not deter me. Especially over other socks in the wintertime. They, too, are now experiencing a fate similar to their predecessor's.

These are my green socks, which were knit on the same principle as my purple socks . I made these out of Artyarns Supermerino back when I first discovered the yarn, and me and Jeanette were on an Artyarn sock kick for a while. I made these two pairs of socks and a pair of deep blue Cowgirl Slipper Socks (for my grandma).

I discovered something about worsted weight socks from this: they may be heavier and warmer than fingering weight socks, but they also leave the impression of the purl side on your feet after you've been wearing them all day as you trudge through the New England snow. This caused them to lose some appeal to me after a while, because that can get uncomfortable. Also, they pilled like crazy!

But anyway, I've darned them twice already, and they just can't take it, since they weren't meant for it in the first place. I still have a small leftover ball of this yarn, and I hope this doesn't squeak you out, reader, but I plan to frog these and make them into something like a hat for my baby or something. I can't waste good merino, and I never had athlete's foot or anything like that, so I think it'll be OK.

My much beloved Funky Socks are experiencing prolonged reconstruction. I only wear a size US 7 1/2 women's shoe, so I usually have some sock yarn left over after a project. I had so much yarn left over after I made them that I could have made a third sock! This finally got the best of me and I decided to make the legs of the socks taller. This, of course, involved some snipping and frogging. So now I have one whole (original) Funky Sock and one like this:

Although it's been in this state for about two years, I'm sure I'll get around to it sooner or later. Right?

Then there's my Fugly Socks. And my other pair of striped socks. Darn, darn, darning they, too, need. Which leaves me with... nothing but the factory made anklets, unfortunately, unless I want to darn all these and have them irrevocably worn out before Halloween. There simply aren't enough of them in rotation for them to last. So I am declaring a moratorium on wearing my hand knit socks until I have at least one pair for each day of the week, if not two weeks.

Sunday, July 18, 2010

New Look

For as long as I have had a blog - nay, for as long as I have wanted a blog - I wanted a pretty, well-lit blog. Alas! I am not a graphic designer, or a web designer, nor can I afford one, and while I will toy with html, I am not as keen on presentation as I would like to be. Seriously. You'd think if a person is artsy-craftsy like me it would carry on over into everything. I see it often - Wee Wonderfuls and Posie Gets Cozy are just a couple examples off the top of my head - people who make wonderfully creative and photogenic things on beautiful blogs that make you feel clean and organized just by looking at them. Then I look at my blog, and I just don't have the enthusiasm to center my header, much less figure out how to get the left and right-hand columns that I have so coveted. I've had to settle for a text column and a right-hand links column only. (I don't know why I want two side columns so badly. Symmetry, perhaps? More room at the top of the page for links? I dunno.) It's a lot like where ever I live. My aesthetic has always been functionality.

Until now. Blogger has a new template system that has allowed someone as design lazy as me to achieve 70% of my aesthetic blog ideal, instead of 30%. And with just clicking a couple options. So welcome to the new, aired-out Crisis of Praxis!

Friday, July 16, 2010

Instruction Woes

For some time now I have been designing a slip-stitch beanie. Or rather, I have designed a slip-stitch beanie (and I'm quite proud of how it turned out, too!) but I have been stuck on the simplest way to convey how it is made to someone who is not, in fact, me.

The trouble is that I am just clever enough to get myself into trouble, yet not so clever that I always know how to get out. The dilemma in getting the gist of this pattern across to others is that I did not go the simplest route. I could have made the beanie to knit flat like so many striped hats are, so that that it could be sewn together with the pattern perfectly aligned, etc. Or I could have made the slip-stitch pattern come in tidy little packets or modules that could be neatly repeated so that all I needed to do was explain how to make the brim (CO on so-and-so number of stitches, knit ribbing for such-and-such many rows, etc.) and then primly refer to a chart to be repeated so many times before moving on to a solid color crown shaping. (A good example of doing that is the l across crossword beanie in Knitty, although it doesn't use slip-stitches.) If I did a crown shaping at all instead of just having it all drawn together at the top or kitchenered off... you know what I mean.

No, no, no. I had the bright idea of working it in the round. And on top of that, it's not a modular slip-stitch pattern. No tiles, no diamonds, or anything like that, where the change over from one row to the next gets lost in the solid colored between spaces. I went for diagonals. That have to line up at the "seam." And there's a very simple trick to making this appear to happen, that when seen in person seems simple, but is not simple to express in writing for someone who is not sitting in front of me. It's just a little skipping trick. A jump to the right, you might say. But I haven't seen it happen in any other pattern out there, so it's either very clever of me, or a horrible aberration that I should never have attempted, or both.

If I ever manage to get it written up coherently you can be the judge.

Gratuitous baby photo!

Lens Error

The digital camera I got while in school for architecture to take pictures of my projects for my portfolio, the metal encased, medium priced name brand gizmo that I have tested the durability of by dropping at every opportunity - it has, alas, finally broken. Suddenly, out of nowhere, it is showing the words, "lens error" on its display when I turn it on and promptly retracting the lens. (I would show you a photo of the message, but... you know.) It looks like I either need to send it to the manufacturer for repairs or cough up the cash for a new one. And cough up I would have to do. Possibly sell my eggs or something. I think I'll price the repair. But until then, despite my recent vow to try to blog more often, I will be relatively pictureless.

I say relatively because I do have a scanner.

Until next time! :P

Saturday, January 30, 2010

Super Simple Ruffled Baby Shrug

As you may have gathered from the title of this post, these are not just gratuitous baby photos. This is about the shrug she's wearing.
As you can see from this sort of back view, it's really straightforward. I wanted something that was not only feminine, but simple and rustic. I think I accomplished that.

Here's my pattern for it.

Simple Ruffle Baby Shrug

Size: 9 - 12 months

Yarn: Paton's Classic Wool (100g, 205 m, 223 yds) Natural Mix

Needles: US9

Gauge: After I knit this up, I decided gauge wasn't especially critical for this project. Paton's Classic Wool calls for US7 needles to get 20s = 4" (10 cm), but I chose to have a looser fabric by jumping up a couple needle sizes to US9. Had I used US7 needles, I probably would have gotten gauge (for some reason, this tends to happen with me), a somewhat denser fabric, and possibly size 6-9 months. So the option of other sizes could be addressed by variously changing the yarn used and the size of the needles, I imagine. Just remember that garter stitch stretches horizontally considerably.

Abbreviations:
PM: Place stitch marker
SM: Stitch marker

NOTE ON BUTTONHOLES: I started mine on Row 3, then made the second one at about 2", counted the number of rows between the first buttonhole and the second, and then placed the third buttonhole after I had knit that many rows. (For example, if I knit 24 rows after the first buttonhole, placing the second buttonhole on Row 25, I then knit 24 more rows and made the following row the buttonhole row. Then I knit three more rows.)

CO 36

Row 1 [WS]: k8, PM, k5, PM, k10, PM, k5, PM, k8, turn.

Row 2 [RS]: *k to 1 st before SM, yo, k1, sl SM, k1, yo, repeat from * to end, turn.

Row 3: k across row, turn.

Repeat Rows 2 and 3 until knitting measures 4" from CO edge, ending with a RS row. Place sts between 1st SM and 2nd SM, and 3rd SM and 4th SM on scrap yarn to be worked later. (These are the sleeves sts.)

Next Row: p3, *yo, p1, repeat from * to 3 sts before end of row, yo, p3, turn. Work in stocking stitch for about 1 1/2 inches (3.75 cm). Cast off all sts.

Sleeves:
Place sts on scrap yarn on needles. With RS facing, rejoin yarn at armpit, making sure to leave about 4" (10 cm) of tail. k3, *yo, k1, repeat from * until 3 sts before end of row, k3. Work in stocking stitch for 1 1/2 inches (3.75 cm). Cast off all sts. Turn work inside out and use CO tail to close gap in armpit.

Finishing:
Sew on buttons, weave in all ends. Block if desired. (The ruffles will curl up at the edges, so I blocked mine to minimize it.)

Voila! You have a baby shrug!

Tuesday, January 19, 2010

Oh, hail!

It was raining like the dickens today. Yes siree, we are in the depths of California winter here - some of the hail actually turned to snow on the back porch. True, there was only enough for one snowball, but what do you really expect? As I said, this is California.

Thursday, January 07, 2010

Knitting Without Tears

I've been reading Elizabeth Zimmerman's Knitting Without Tears while nursing the baby down to sleep at night, which has it's pros and cons. The positive side of it is that I am reading something both interesting and educational. I used to be a bookaholic. Okay, perhaps I still am, since the only thing that rivals my yarn hoard is my book hoard, but the point is that before the arrival of the baby I actually had time to amass and read these books, rather than simply amass. They say that when you have a child that it takes up time that would otherwise be spent on other things. This is true for obvious reasons. What is hard to predict, however, is what shape this will take. Some people say that the knitting suffers. I find this not to be the case, especially now that the baby enjoys being in her walker for periods of time during the day. For me, reading as a daily activity got pushed out of circulation. But thanks to our new evening schedule (I wash baby, daddy oils and pj's baby, I nurse baby down to sleep and read while laying with her once she's stopped fussing) I am opening books again. Very good, illuminating books. Which brings us to the cons of the situation.

Knitting Without Tears makes me want to knit everything in her book. Just exactly as she tells me to, and ASAP. I thought I was a pretty knowledgeable knitter, but she really opened my eyes to some fundamental things that I am shocked I've overlooked for so long. Like that backwards loops aren't just for adding stitches at the end of rows or buttonholes - it can stand in for an M1. Simple, obvious, and totally overlooked by me. So here I am at nights, engrossed and gobsmacked by this book, a six month old baby firmly latched on to my boob while I lay in the bed, unable to get up and get to work exploring these sudden revelations.

It is, in a word, torture.

I finished it last night, thank goodness. Now I am waiting for another Elizabeth Zimmerman book in the mail. Because I am a masochist.

Please enjoy the following gratuitous holiday baby photo: